New designer blouse back neck cutting and stitching
In this fast-paced world, everything is constantly changing. Fashion is not stagnant as well. With the onset of a new year, comes closet revamping. It’s time to clear your closet from all those old days goodies and fill it with some new years trendy pieces.
Ethnic wears are really flooding the market nowadays. Gone are the days when people only used to focus on western attire for festive occasions. Ethnicity is trending. Who would have thought this 6 yards cloth material could work wonders?
While talking about sarees, not to mention the blouse is something everyone has their eyes on. From backless to sheer to lace, all the ladies want to grab all of them. While your fashion competitors are always hunting for your fashion finds, and you are all set to leave them in awe. Let’s dive into the world of trendy designer blouse pieces that are must haves.
Having said that, getting a blouse tailored can be really tiring. There are loads of things that could go wrong. You might not get the right fitting, or the correct design and so much more. So to save you from all the hassle, we are here to help you. In this article we will show you some easy breezy tutorials to get your custom fit blouse right at your home. So without further ado, let’s begin!
New designer blouse back neck cutting and stitching at home
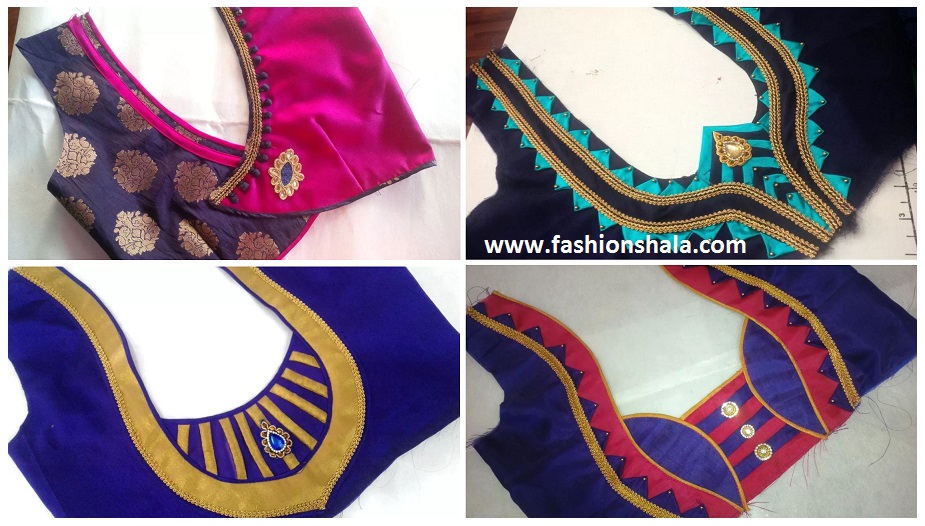
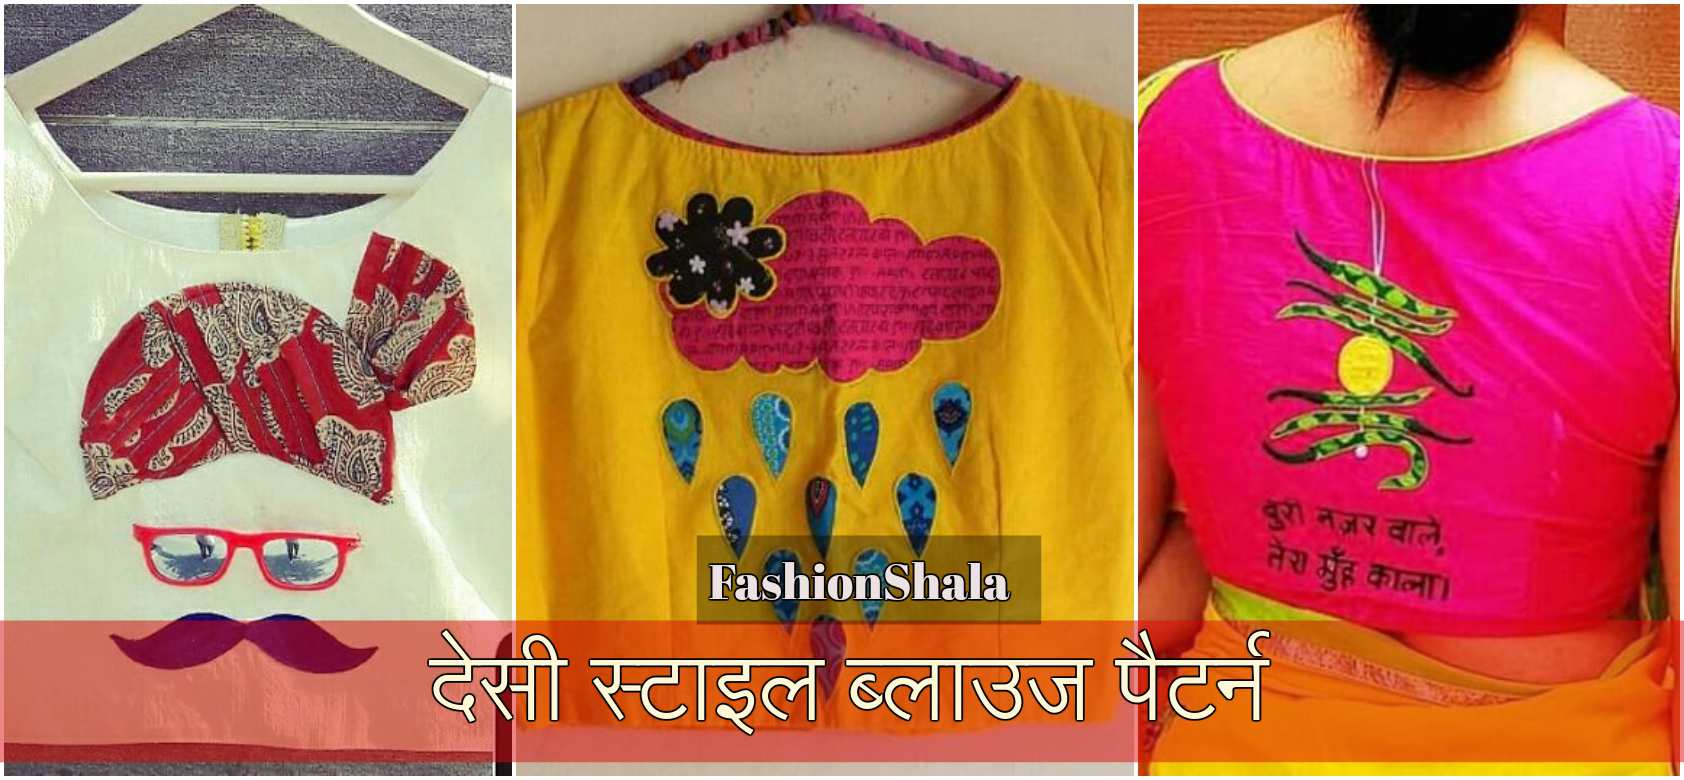
1. Colour blocked blouse design:

- Take a spare blouse piece and cut out a blueprint of the neck design.
- Take whatever measurements are appropriate for you.
- Cut out the design and make a mark at the centre.
- Measure 2 inches from the middle and make the angled design as seen in the blouse.
- Cut out the pieces.
- Take the actual blouse pieces and cut out the blouse design. One on the blue part and the other on the pink part.
- Stich the spare piece and the actual blouse piece together so that you get two individual pieces.
- Cut out the excess fabric.
- Cut out two broad strip from the pink leftover piece.
- Use it for piping on the blue piece across the neckline.
- Fold it from the middle and stitch halfway through.
- Repeat the same process of piping at the bottom.
- Now take the pink piece and do the piping with the blue cloth material. So that it creates a contrast.
- Cut another broad strip from the blue fabric and cut it into squares.
- Wrap it over some small thermocol balls to create the button design. Secure it with a thread.
- Stich it along the neckline on the pink fabric.
- Place a golden lace along the neckline to make it more attractive as shown in the image.
- Now take the two blouse pieces and place it in an overlapping position. The pink piece on top of the blue piece.
- Stitch it all over and use a brooch at the end to enhance the beauty as shown.
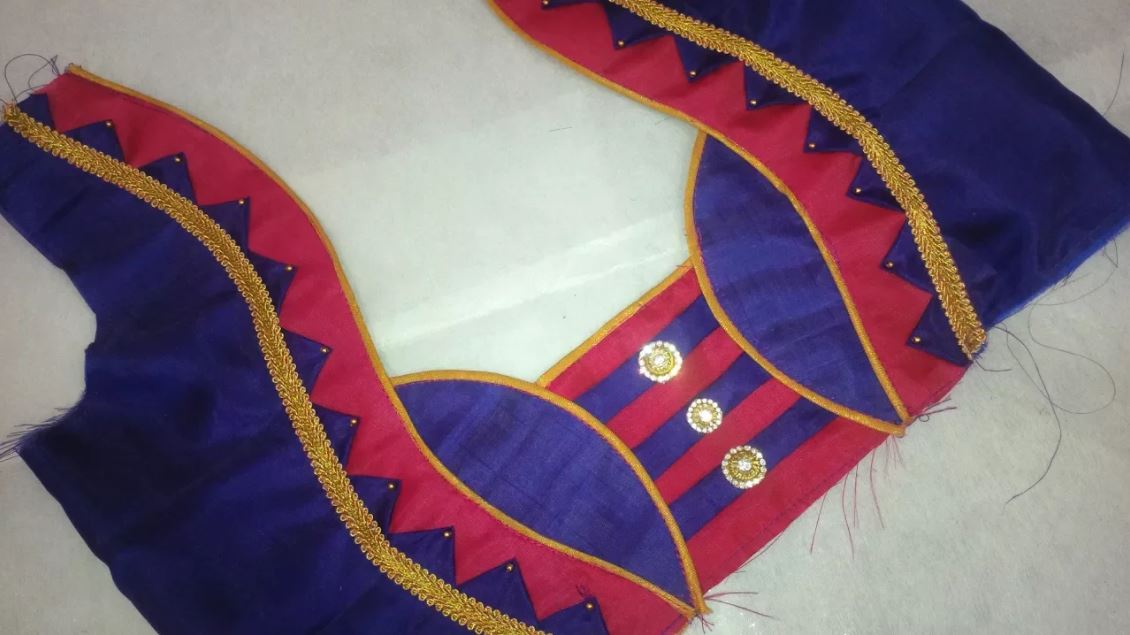
2. Pot neck blouse design:
- Take a spare blouse piece and cut out the pot neck design.
- Also cut out the semi-circle as shown in the image.
- Use your own measurements.
- Take a canvas paper fold it into half and draft the same design on it.
- Measure 1.5 inches on the canvas paper and draw some lines along the shape of the pot design.
- Join the lines to get something like an S.
- Cut out the design.
- Now take the semi circle and draft it on the canvas paper. Draw it in the shape of an eye.
- Now place the pieces on the actual blouse fabric fold it into half and cut it out.
- Take a reddish pink fabric fold it into half and cut out the S design.
- Cut out the eye shape as well.
- Iron the canvas paper onto the blouse piece and stitch it.
- Stich the rest of the cut out fabrics as well.
- Cut out the excess fabrics to make it neat.
- Stich the S shape across the neckline of the blouse as shown to give it a pot like shape.
- Cut out some squares from the blue fabric, fold it in a triangle shape and stich it over the red area as shown.
- Cut out two golden strips for the piping.
- Take a golden lace and stich it on top of the triangles to hide any uneven edges as shown.
- Now take the two eye shapes, place it over a blue fabric and stich it with golden piping.
- Now cut out a square red piece for the middle.
- Secure it with golden piping.
- Now cut out strips of blue fabric to stitch it on top of the red fabric.
- Stich the two eye shapes to both the sides of the square red fabric to get the look as shown.
- Now take the two pot shaped blouse pieces and stitch it to both sides of the eye shaped fabric.
- Once all the stitching is all done finish off with some beads and flower decoration as shown.
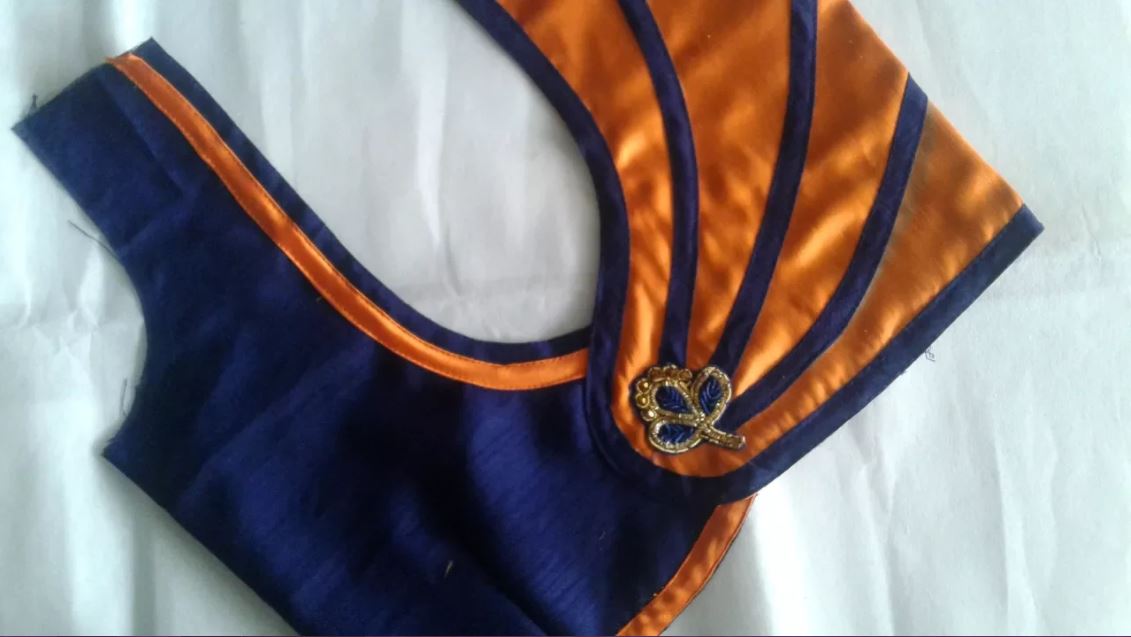
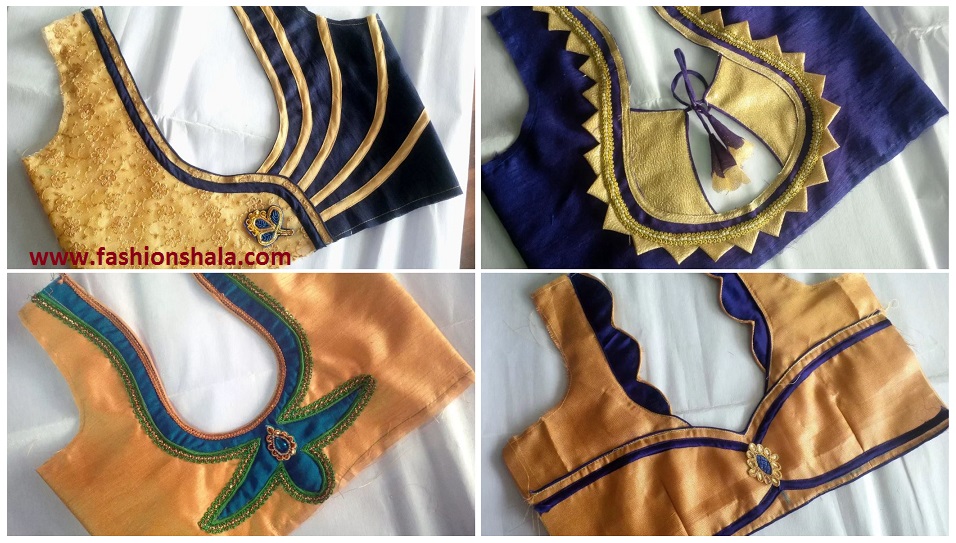
3. Contrast blouse design:
- Take a spare blouse fabric and mark 3 inches on the top and 3 inches halfway through as much as you want your blouse depth to be.
- Join the points and make a slight U design.
- Cut out the fabric.
- Mark a line in the middle and measure 1.5 inches and make a semi-circle on the left side.
- Cut out the shape and u will get two individual pieces.
- Now place the cut outs on an orange and blue fabrics respectively.
- Stich the fabrics and cut out the excess.
- Fold the fabric into half and stich halfway through.
- Use the blue fabric for the piping.
- Take the orange fabric and cut out a strip.
- Stich it across the neckline of the blue fabric leaving a little space as shown.
- Use the same fabric for the lower border as well.
- Now take the orange fabric and border it with blue fabric.
- Now take a flower broach and using it as a guide draw 3 lines as shown.
- Take 3 blue strips and stich it over the lines to get the design as shown.
- Stich the brooch on top of it.
- Now take the two fabrics a d place it in an overlapping position.
- The orange fabric on top of the blue fabric.
- Stitch it all over and you are done.
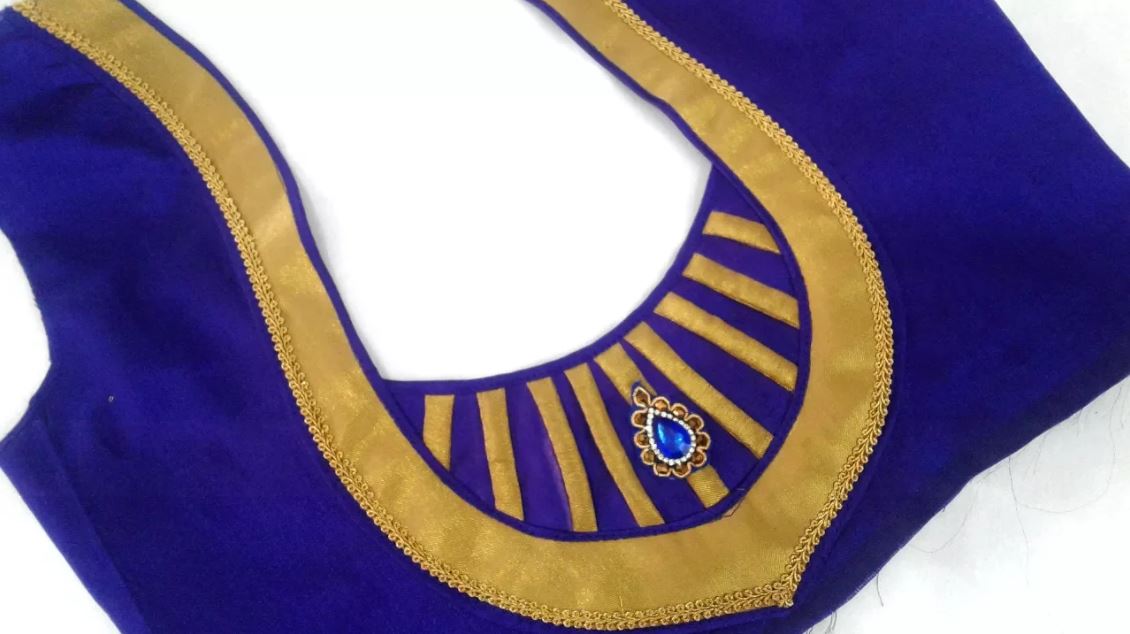
4. U shaped blouse design:
- Take the blouse fabric and using your old blouse as guide measure the depth of your neck.
- Measure 2 inches at the top and a little bit above the bottom.
- Draw an S joining the two points.
- Cut out a fabric and cut a half-moon as well.
- Place the fabric on a blue fabric and cut out the design.
- Take a canvas paper fold it into half and draft the S shape on it.
- Measure 1.5 inches and draw some lines along the S design.
- Join the lines together to get a double S and cut out the paper.
- Place the shape on a golden fabric and cut out the shape.
- Cut out the semi-circle shape on a blue fabric.
- Iron the canvas designs on the fabrics and stitch it.
- Cut out the U design and use a blue fabric for piping.
- Now take the base design on a lue fabric and stich it.
- Cut out the excess fabric.
- Stich the golden fabric across the neckline as shown.
- Take a strip of blue fabric for piping.
- Take the half-moon double coat it with blue fabric and fold it into half.
- Draw a line in the middle and using it a s guideline draw some more lines as shown.
- Cover the lines with some golden strips.
- Secure the top with a blue piping.
- Assemble the fabrics and place the half-moon in the middle and stich it.
- Use a golden lace along the sides as shown.
- Finish it off with a crystal brooch.
5. W shaped blouse design: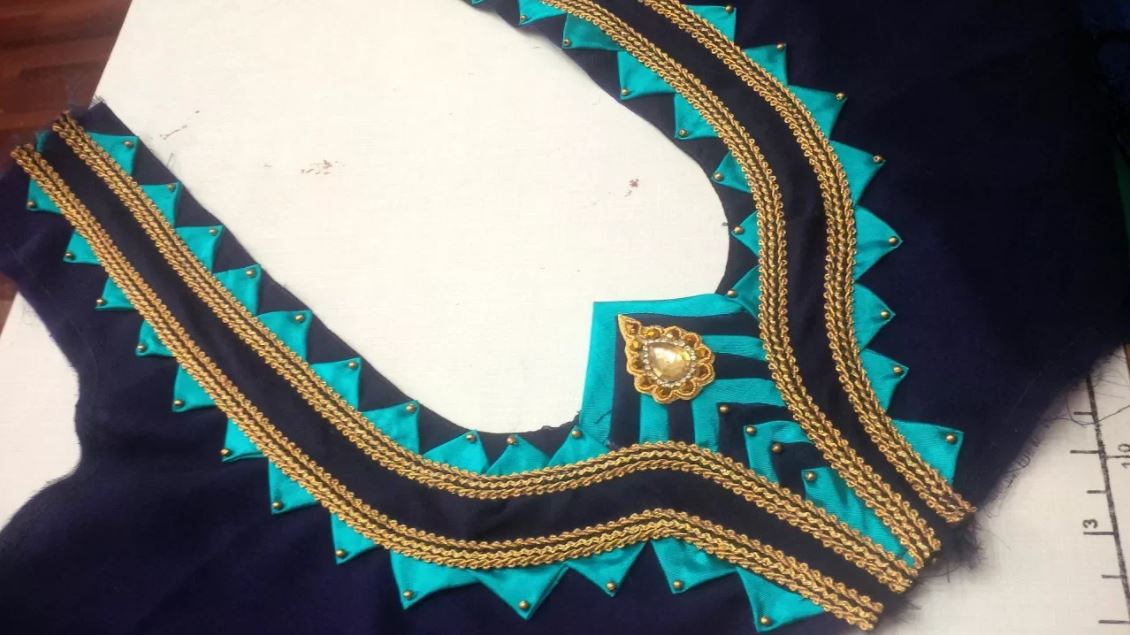
- Take a spare fabric and measure 2 inches at top and a little above the bottom.
- Join the two points and cut out the design. Also cut out the sleeves.
- Fold the blouse fabric into half and place the design on top and cut it out.
- Stich the fabrics and cut out the excess to get an U shape.
- Flip the fabric inside out and stich it all over.
- Cut out some squares of light blue and dark blue fabrics.
- Take a square piece and fold a little blue fabric in a triangle shape and stich it on top of the square.
- Repeat the process with the contrasting fabrics till you reach the end.
- Stitch the design in the middle of the base U design to get the illusion of a W design.
- Take some light blue squares and fold it in a triangle shape.
- Stich it across the borders of the neckline as shown.
- Now take a dark blue strip and stitch it over the triangles to hide any uneven edges.
- Repeat the same light blue triangle step on the other side of the dark blue strip as well.
- Now take a golden lace and stitch it across the borders of the dark blue strip as shown.
- Once everything is stitched in place finish off with some beads and a brooch for decoration.
Hope you enjoyed the tutorials. Try these at home to get your own customized blouse and save yourself some money. For more latest updates, stay tuned to Fashionshala.

About Author
sanjana
Pursuing my graduation in English Major. My hobbies are reading, listening to music and you tube. I am a mediator type and I find good even in the worst case scenario.