Blouse Back Neck Design Cutting & Stitching Tutorial
Ethnic wears are really on the run nowadays. People of all ages are spotted in ethnic attires all around us. We must admit that this is the best thing about being Indian! No matter how much we try to incorporate western clothes in our lives. We must never forget our culture. Being modern is not forgetting our ethnicity but taking it to the next level.
Today in this article we are going to talk about a gorgeous ethnic wear the “saree”. This attire is favoured by ladies of all ages nowadays. We have even spotted out favourite celebs like Anushka Sharma, Shilpa Shetty and many others in sarees. They have all added their own little personal style into it.
Now that we have talked about saree, let’s step into blouse. Because a saree without a blouse is incomplete right?? This is the piece that everyone notices at first and with this material we can always up our saree game.
The blouse can make or break your entire attire. When chosen right, like right pattern, design and fabric, this can even transform your most boring saree into a statement piece. On that note we must say that the back and neck designs are something that we all drool over. Let us just honestly admit there there have been so many times when we have annoyed our tailors to get that perfect blouse stitched. Literally so much that they were on the verge of going mad. Right???
Alright, so un this article we will provide you with some videos that will help you in stitching your own perfect blouse. Just how you want right at your home. This will save you your money as well as the tailors in your area.
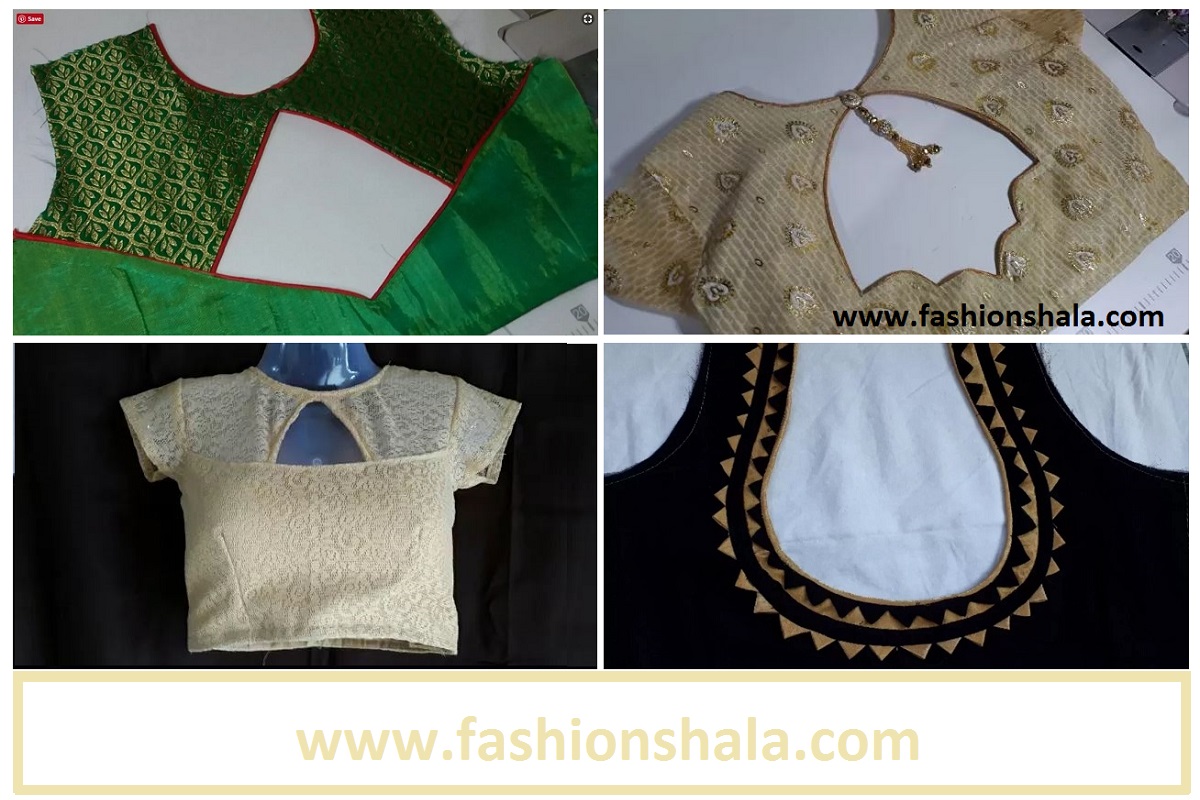
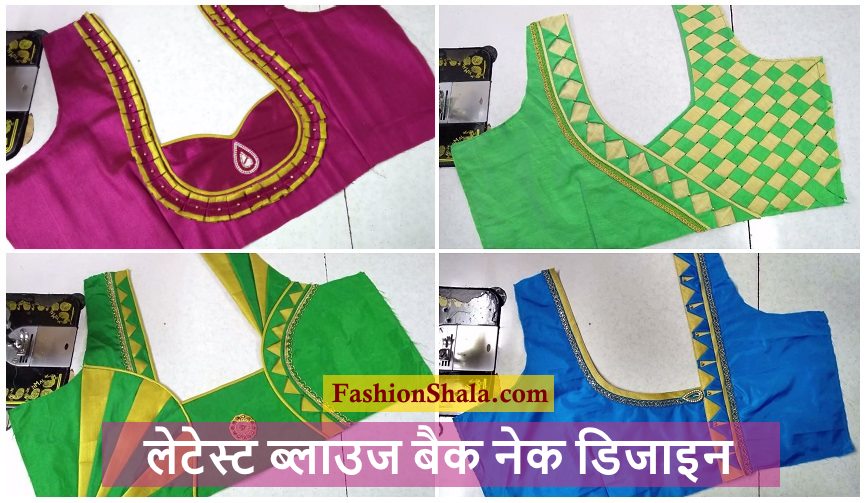
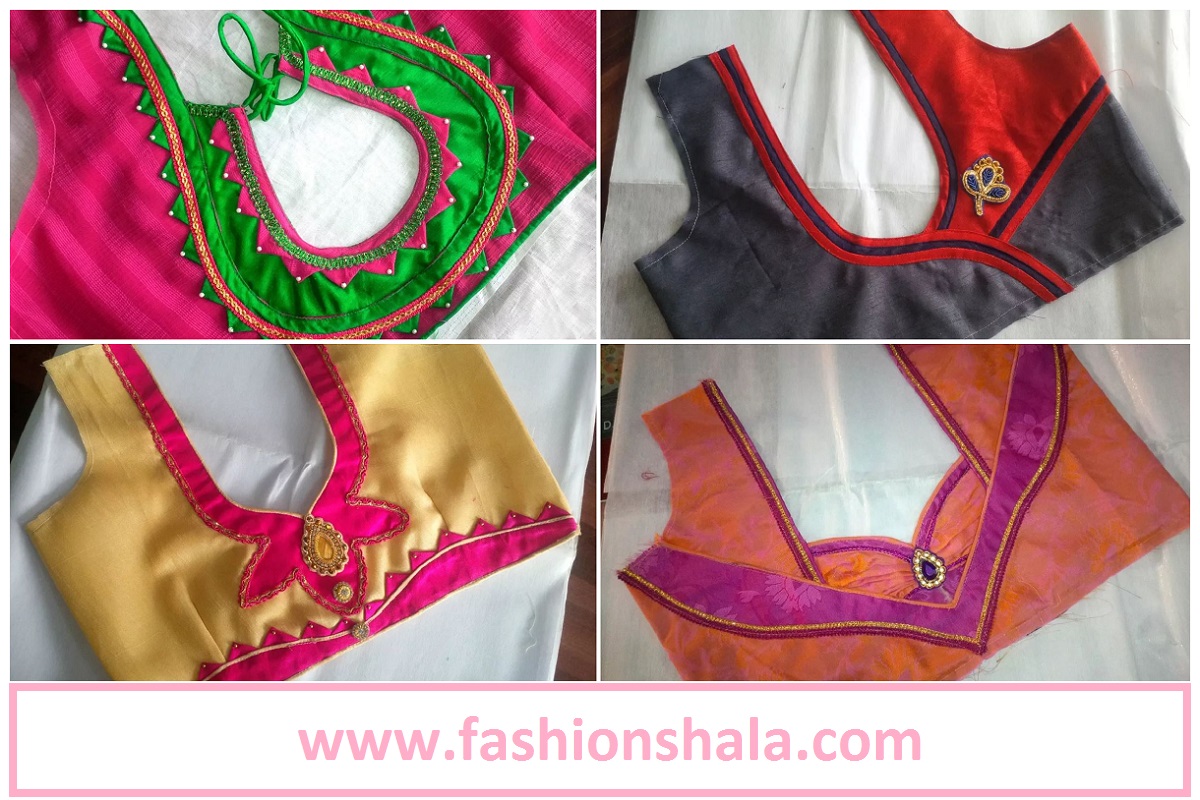
But before we dive into the tutorial, let us first see some of the latest blouse neck and back designs that you can choose from while creating your own favourite blouse.
- Backless blouse:
Shocked right?? I was too. You must have heard this adjective being used for western attires never thought of a backless blouse. But don’t loose hope so soon. Founded by designer Gursakhi Lugani, this blouse stunned everyone who thought saree was boring. Let’s admit backless is always urbanely sensuous. This is exactly what this blouse does. It converts your boring saree to an eye-catching statement piece.
2.Asymmetric back neck:
This style was so trending in 2018. We spotted this pattern on dresses, tops, kurtas and even jackets. Don’t stop here, we have the blouse too! As we are all familiar with the pattern the blouse also has the same design with sometimes a keyhole added to it’s charm. This looks good on all kinds of fabric.
3.Mesh back:
Apart from tops and dresses this pattern is popular in blouses as well. For those who are not comfortable wearing backless but still want to take it up a notch, this is a perfect choice. Not too much skin showing yet trendy. This suits best on cotton or silk fabrics.
4. Round pot neck back:
This is a blouse that is best suitable for bridal wear. This is a very versatile piece. It can be paired with sarees as well as lehngas. This has an opening right on the backside of your shoulder and the fastening is right at your upper waist.
5. Sheer back:
This is another elegant blouse. This is also a perfect option for all those who are not comfortable with too much skin showing. You can get this on all fabric and prints and patterns.
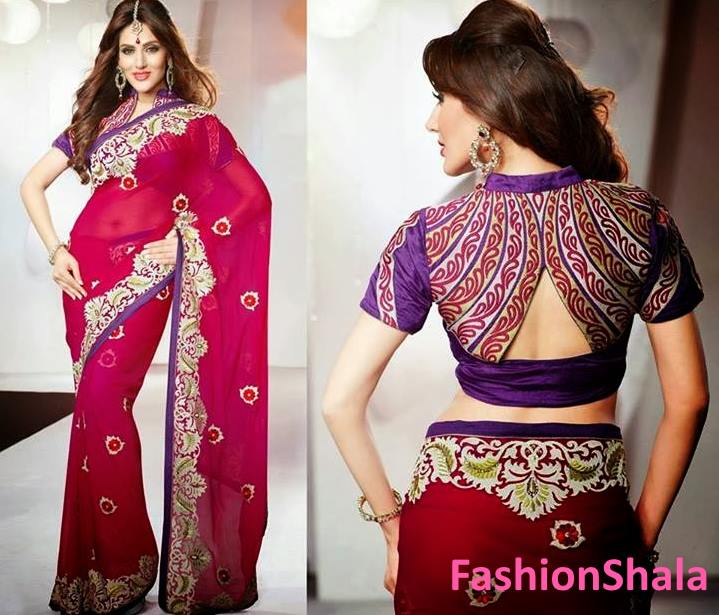
6. Faux bow back:
This blouse has a deep you at the back. And by deep I mean very deep. It also has a faux bow at the bottom. So you are saved the pain of tying a bow all the time.
7. V neck back:
This is another elegant back designs. Suitable for bridal and party wears. It has a nice plunging V design at the back. The bottom part is mostly lace. This pattern looks best on lace or sheer fabrics. You can also add in your own personal touches here and there.
8. Back open sleeveless blouse:
This is also a very versatile design. You can pair this with a pot neck design or just strappy crop top design or even a boat neck. This is basically a sleeveless blouse with a fastening at the bottom. This leaves your whole back bare. It is suitable for all fabrics, colours and patterns.
9. Tie- up back blouse:
This is a very popular design in blouses. We all must have irritated our tailors at some point or the other to make it right. This is a basically a backless blouse with thread tie- ups at the back. It is simply elegant and chic.
10. Racer back blouse:
Speaking of modernity this is one very latest blouse designs. This is just a race back design which leaves your both shoulders bare and gathers in the middle. Since we are familiar with this pattern, there is nothing much to discuss about it.
Now that you have seen all these designs, I know it is a very hard choice to make. So until you make up your mind as in which design to pick up. Let us see some videos to make it easier for you to do it on your own.
Sleeveless pot neck back tutorial:
- Take the inner fabric of your blouse and measure the length as 13 inches, width as 5.5 inches, hands as 5 inches and your bust as 8 inches(if your bust size is 32). Keep 2 inches extra. Measure with a measuring tape.
Note: You can take your own measurements according to your body. These are just some sample measures.
- Join all the marks together.
- Measure your neck length as 10.5 inches and width as 2.5 inches.
- Make a U shape on the fabric.
- Join all the points and cut out the fabric following the guide.
- Now take a sample paper fold it and mark the same neck measurements as before.
- Join the points and make a wavy pattern going above and below the joined line.
- The wavy line should in the shape of a pot.
- Cut out the paper.
- Take the outer sheer fabric and place in on your inner fabric and cut it out.
- Now press stick the paper cut out on a golden fabric so that it matches your blouse.
- Cut the fabric leaving 1 inch extra for sewing.
- Place the pot neck on your blouse fabric and start stitching.
- Cut out the excess fabrics to make it clean.
- Take a 2 inch cloth strip and cut it into squares.
- Fold it into four halves and stitch it.
- Stitch those boxes onto your pot neck.
- The pattern should be stitched in small V pattern on the golden strip of your blouse.
- Now take another golden strip to do the piping on the ends of your neck.
- Now take another golden strip and as you have done with the black strip do the same with golden strip.
- Stitch it to the blouse.
- Take a black strip stitch it into a thin strip and attach it to the middle of the design that you just made.
Now your blouse is ready to wear.
Fir more detailed information watch the video down below:
Now let us see another tutorial to make your understating even more easier.
Back cut out design blouse:
- Take a sample paper fold it into half and keep the length as 13.5 inches, shoulders 7 inches, biceps 7 inches and bust 7.5 inches(if your bust size is 30)
Note: You can take your own measurements according to your body.
- Take the neck depth as 4.5 inches and width as 3 inches.
- Join all the points and cut out the paper.
- Now take 2.5 inches from the bottom of the paper and make a slanting line to meet the first cut.
- Make a triangle shape in the middle and an U shape for the neck to pass through.
- Cut all the shapes.
- Once your shapes are ready place it on the inner fabric of your blouse and cut the shapes. You will get two pieces the top half and the bottom half.
- Leave 1/2 inches on the sides for stitching.
- Now place the shapes on the outer fabric of the blouse and cut the shapes.
- Since we are creating a contrasting design. The fabric should be of 2 colours that easily complements each other. You can take different textures of the same colour as well.
- Press the cut out paper on the the fabric pieces.
- Once everything is done. Stitch it.
- Turn the fabric inside out to get the visible side on top and stitch it all around.
- Take a red fabric strip and do the piping.
- Place the bottom half which is a broad V over the top part to create a cut out design. Now stitch it to secure it in place.
- Once everything is stitched your blouse is ready.
For more detailed information watch the video down below:
Here comes another tutorial for your own designed blouse at home.
Fancy back cut out blouse:
- Take the inner fabric of the blouse and measure the length as 13.5 inches, shoulders 7.5 inches, biceps 7 inches, bust 8.5 inches( if your bust size is 34)
Note: You can use your own measurements according to your body.
- Keep 2 inches extra and cut out the basic shape of your blouse.
- Now place the fabric on the outer fabric of your blouse and cut out the shape.
- Now take a canvas paper and let’s cut the design.
- Fir this fold the paper into half and measure 3 inches each for length, depth and width.
- Join the dots you will get a square now inside the square make an arch.
- Now measure 11 inches for your neck opening and draw a semi-circle making small U on the top.
- It should somewhat see like a wave.
- Cut out the design and press it on the inner fabric of your blouse.
- Cut the fabric and join it with the outer visible fabric.
- Once the fabric is placed on the top, stitch it following the guideline.
- Cut out the fabric following the design. Once you get your desired design stitch it.
- Once everything is done turn the fabric inside out and do the piping.
- Once everything is stitched in place take a button and wrap it with the blouse fabric and hand stitch it.
- Once that is done take a tassel of your choice and join it together with the button.
- Take the tassel and secure it on the top of your blouse where you have a little opening to cover it.
- Stich ot properly and your blouse is ready.
For detailed illustration please watch the video down below:
Now that you have seen all the tutorials, I am sure you have also made up your mind as in which design you want for the festive season this year. So keep trying these at home. Very important if you are not familiar to sewing please do it under adult supervision. Till then keep rocking!
You’ll Also Like
About Author
sanjana
Pursuing my graduation in English Major. My hobbies are reading, listening to music and you tube. I am a mediator type and I find good even in the worst case scenario.