Press "Like" to follow us
Kurti Collar Neck Design Cutting & Stitching Tutorial
We as Indians love elaborate and designer dresses. We love to splurge our money on all those beautiful dresses out there. What if we are able to make those beautiful neck designs.
If we know all of them we will be able to design and make our dresses very easily. This will provide us with autonomy with our dresses. Let us get started with neck designs.
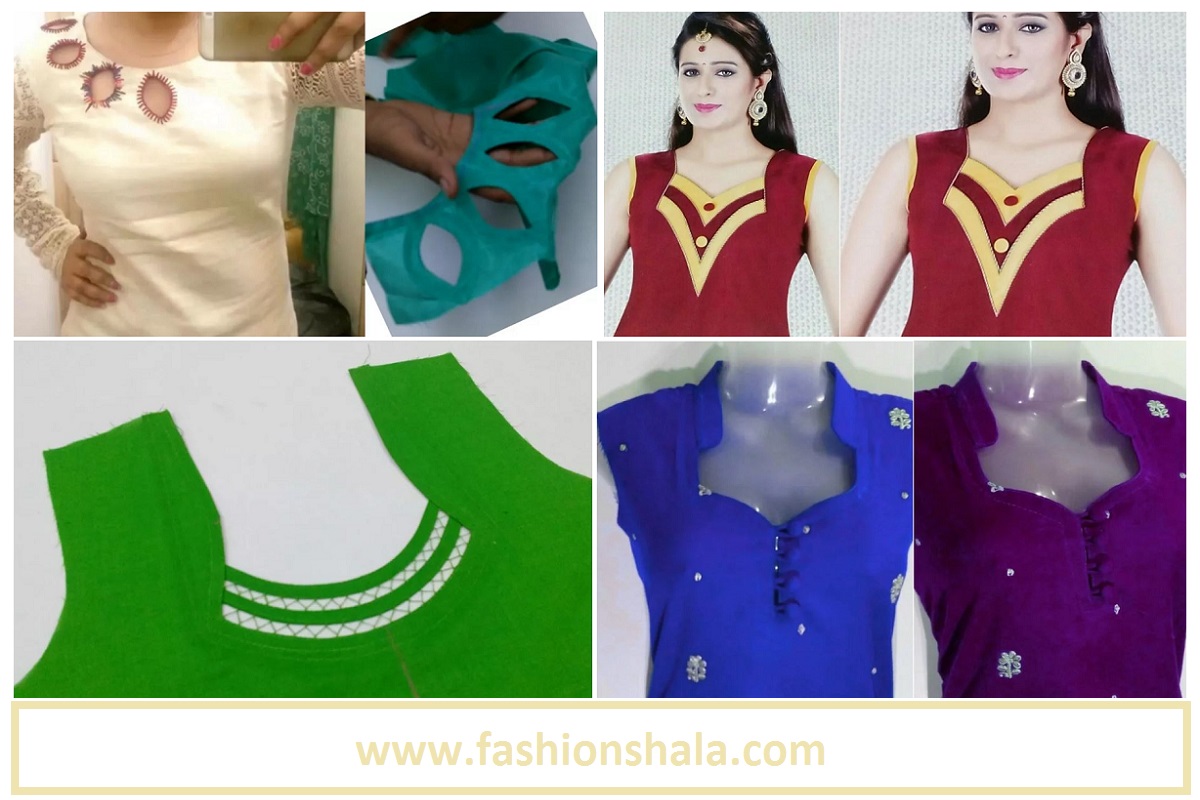
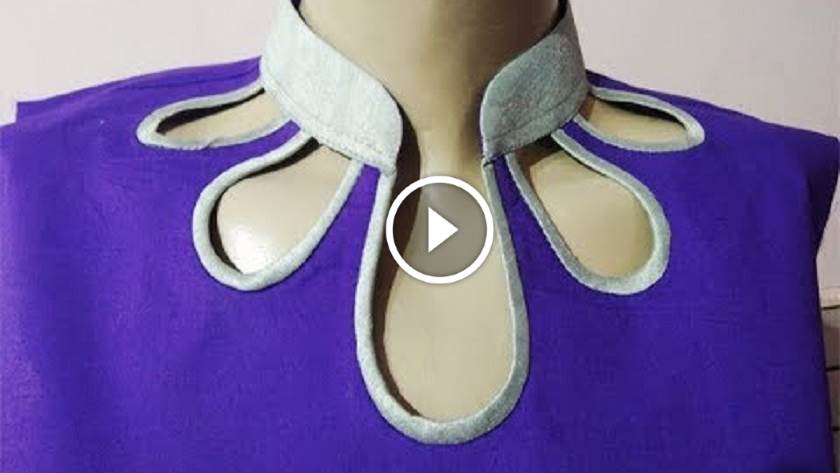
We are going to make a high neck design for a kurti.
Beautiful Kurti Collar Neck Design
Going step-wise we follow these steps:
- First of all make a basic cutout of the kurti design. Cut the sleeve portion and the basic shape of the kurti. Do not cut the neck portion.
- Take a paper pasting. Take 9×9 piece of paper pasting and paste it onto the neck region of the kurti with the help of an iron.
- Kindly paste the pasting in a balanced way, having equal halves on either side of the middle parting of the kurti.
- Mark the middle at 2.75 inches on both sides and cut it half an inch inside the marks.
- Now mark 3.5 inches further downwards at the middle from the previous mark.
- Make a straight line .75 inch inside of the middle part. Now round the lowers edges.
- Cut this petal out.
- Now flatten this petal and cut half an inch round from the bottom.
- Mark this petal half an inch away at the top edge. Mark it with a pen.
- Now cut half an inch from the round of the petal. Now place it half an inch away from the top edge. Mark it with a pen.
- Now cut these petals out. Because we have folded the cloth in half, the same design gets copied on the other half of the neck design. Cut the marked petals out carefully.
- Now open the fold of the cloth and lay it straight with the front side upwards.
- Now cut the piping cloth in 1.5 inches width. We will be using silver piping on the purple kurti. You can choose any befitting coloured piping.
- Now halve the piping. Now stitch it ono=to the right side of the middle most petal first. Once you are done with this step. Cut the excess cloth off. Now fold this piping inside and stitch it keeping away from the piping area.
- Clean the edges by cutting off excess cloth and threads.
- Now complete all the petals using the same procedure.
- Now cut a semi-circular portion of the purple cloth half an inch more than the cut portion of the kurti.
- Sew the kurti from the top onto a piece of a newspaper. Make sure the petals are open in an equivalent manner.
- We mean to say that the petals should not seem disproportionate.
- Now sew the edges and cut the round in the desired measurements.
- Sew the backside from the shoulder portion
- Now we will jump to the collar part of the neck.
- Mere the length of the required collar.
- Now start with a piece of bookram which is 2.5-3 inches broad. Shape it according to the shape of the collar. We sew the collar onto the kurti following the method as explained in the video.
Moving on to the next kurti neck design. We start with the basic cut of the front side.
Kurti Collar Neck Design: Simple & Stylish
- Fold the front side in half from the middle. Now mark 2.5 inches both in the vertically downwards and horizontal direction at the top of the middle fold.
- Cut this portion in a circular fashion.
- Now make a bigger circle whose base point is 7.5 inches below the previous edge. Measure the circle and draw it on a piece of bookram.
- Cut the piece of bookram as marked. You will get a horse-shoe design of the bookram. Cut the excess outside as well. The design may vary between 0.5-1 inch width of the bookram.
- Now cover this piece of bookram in the same cloth as the kurti. Now place it on the wrong side of the front of the kurti and cut the excess from the top.
- Cut the shape from the inside and stitch the cloth inwards.
- Now sew the back of the kurti from the shoulders.
- Give the backside a curve for the neck at the right position.
- Now start with the collar making process. Cut the collar of the desired dimensions from the bookram.
- Now cover this collar in the same cloth as the kurti. Be careful about the curve of the neck of the kurti.
- Set the collar with the help of an iron. A centre for the collar and the kurti as well.
- Now stitch the collar to the kurti from the wrong side of the kurti. Sewing on the wrong side gives a better finish to the finished kurti.
- After you are done with the collar attaching process. Take a lace and slowly and steadily sew it onto the neck design. This will enhance the grace of this design.
- Go slow over the edges while attaching the lace to the design.
- Now take a button and a button-hole. Attach it to the region in between the neck and the lower circular design.
- This will ensure the steadiness of the design. You can either sew the button-hole or attach it with needle and thread using your hands.your beautiful neck design is ready.
We have beautifully completed learning these beautiful neck designs. Now jump on to making strikingly beautiful neck designs for your beautiful kurtis. Let the creativity and hard work flow.