Selected Pant Cutting & Stitching Tutorials
Put on your sassy and positive pants on, because stitching a pant couldn’t be more easier. Stitch them, with your own hands and love!
We come with two different ways of stitching a pant.
The process of cutting and stitching a pant is clearly given below. You will find the process trouble-free and very simple to try at home as well. Pants can be worn anywhere whether it’s formal meeting or a party with your friends! Pants are so in the trend Currently. Go ahead reading the procedure and start stitching one of your own pant!
Before getting on the procedure given below are the things required to stitch these two types of pants:
- A sewing machine
- Tailors chalk or you can use normal chalk as well
- Inch tape
- Scissors
- Threads matching with the fabric
- You’ll need 2 meter of the fabric for stitching both the types of pants that are given below.
Pant Cutting & Stitching
Ladies Pajama Pant Cutting & Stitching Tutorial
1. Take the cloth from which the pant will be made, and just give it a double fold.
2. Now, draw the measurements only on half of the cloth according to your size of your pant using chalk.
Note : click on the link given below to understand the procedure of drawing the measurements :
3. Now carefully cut down the cloth according to the measurements with the help of scissors.
4. Now take the cloth which we cut in the last step that will be the front of the pant, and place it on the other half of the cloth.
5. Now draw the measurements on the second half of the cloth also with chalk.
6. Carefully cut the second half of the cloth using scissors according to the measurements drawn in the last step that will be the back of the pant.
7. Now we have both, the front and back of the pant, we will attach them both simply by stitching.
8. Double fold it from the waist and Stitch it for the elastic or thick thread.
9. Fold and stitch the ends of the pant as well to give it a good finishing.
That’s all the pant is ready to wear!
Useful Read: 7 Golden Rules to Help You to Choose Perfumes
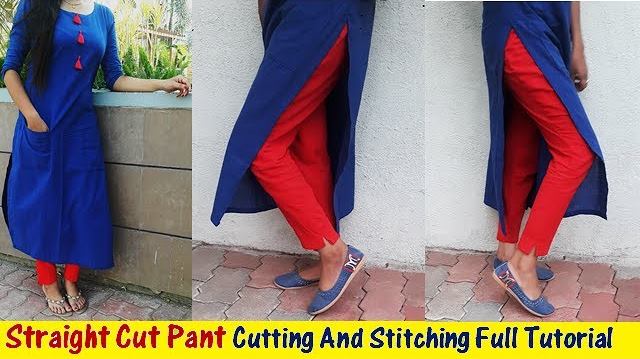
DIY: Straight Cut Pant Making Tutorial
1. Take the cloth, make sure it’s thick enough and not very transparent and then fold that cloth into four.
2. Draw the measurements properly on the cloth with the chalk.
The exact measurements are as follows:
1. Length – 34inches
2. Knee length – 19inches
3. Knee breath – 15inches
4. Hips – 37inches
5. Mori – 10inches
3. Carefully cut the cloth according to the measurements drawn in the last step using scissors.
4. After cutting the cloth as per the measurements there will four parts of the cloth.
5. Moving on to the stitching part, we will attach all the four parts by stitching in a Certain way, be careful on this step because it’s complicated.
6. Finally the next step is fold the cloth from the ends and stitch it which gives the pant a good finishing.
7. Fold and stitch from the waist line as well for the elastic thread or normal thread.
8. The last step is to wear and flaunt it because the pant is ready!
Many thanks for reading this, we hope this was helpful.
Useful Read: Long Skirt Cutting & Stitching Tutorials
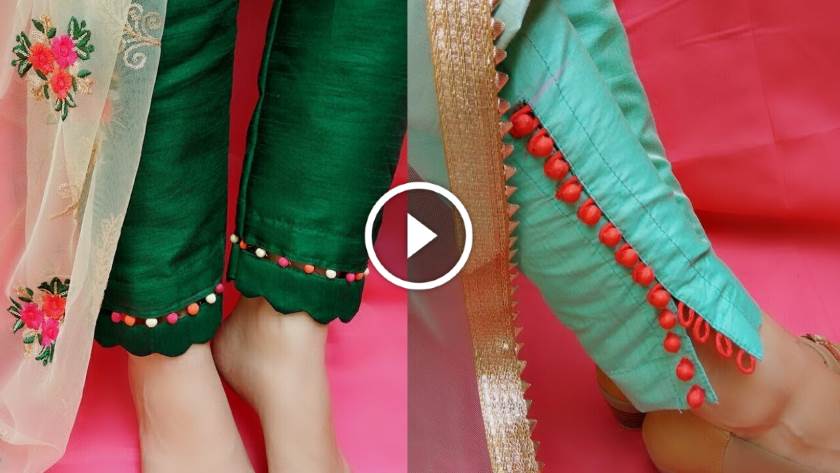
Trending Plazzo Pant’s Bottom Designs